Friday 28 June 2013

What Every AMERICAN Sailor Needs to Know About Entering Canada

Posted by:  
My PhotoMichael Leahy, www.great-lakes-sailing.com


ENTERING CANADA

As an American citizen, you must report to Canada Border Services Agency (CBSA) for inspection upon entering Canadian waters. 


Entering Canada occurs when you cross the international boundary and enter Canadian waters. This is different from the US regulations which require you to report when your vessel first comes to rest in US waters, whether at anchor or at a dock. 

This reporting requirement applies whether you land (ie dock), anchor or enter a river or canal system. 

It applies if you are 'weaving' in and out of Canadian waters – for example while engaged in recreational fishing.

The only exception is if you are “in transit”, defined as proceeding directly from 1 point outside of Canada to another point outside of Canada in a continuous, uninterrupted passage with no delays or stop-overs. This is not considered to be entering Canada. 

Here are the various situations which you may encounter entering Canada:
A) If you have left the United States and landed on Canadian soil (eg – docked at your favourite yacht club or marina), you must report to a CBSA marine reporting site and then call the Telephone Reporting Centre (TRC) at 1888-226-7277 (1-888 CANPASS), using the telephone reserved for this, to obtain clearance. Only the Master may leave the vessel to carry out this reporting procedure. Neither passengers nor goods may leave the vessel until it has been cleared into Canada.

B) If you are entering Canadian waters but do not land on Canadian soil, you still must report to CBSA. However, you can use your cell phone to call the TRC (1-888-226-7277 / 1888-CANPASS). 

If you change your mind and decide you want to land on Canadian soil, even though you reported in by cell phone upon entering Canada, you must still report to a CBSA marine reporting site and then call the Telephone Reporting Centre (TRC) at 1888-226-7277 (1-888 CANPASS) ,using the telephone reserved for this, to obtain clearance. Only the Master may leave the vessel to carry out this reporting procedure. Neither passengers nor goods may leave the vessel until it has been cleared into Canada.

If you are entering Canadian waters with no intention to land on Canadian soil and do not have a cell phone to call in, you must report to a CBSA marine reporting site and then call the Telephone Reporting Centre (TRC) at 1888-226-7277 (1-888 CANPASS),using the telephone reserved for this, to obtain clearance. Only the Master may leave the vessel to carry out this reporting procedure. Neither passengers nor goods may leave the vessel until it has been cleared into Canada.

C) If you are 'weaving' in and out of Canadian waters (not in transit, as defined above) you must call the TRC (1-888-226-7277 / 1-888-CANPASS) upon first entering Canada to obtain clearance. However, you only have to do this the first time you enter Canadian waters. 

When you call the TRC, expect a series of questions about the purpose of your trip, about yourself and any passengers, your vessel and any goods being declared. Keep your answers direct, to the point and professional. The CBSA officer will determine if any further inspection is required. If not, you will be given a clearance number. This number is your release and approval to enter Canada. Have a pen and paper ready to record it - preferably in your ship's log. You will need it at hand throughout your stay in Canada. 

If the CBSA officer decides that a further inspection is required, the Master will be ordered to ensure that all passengers and goods remain on board until an inspection team arrives.

DOCUMENTS
If you are a citizen of the United States, you do not need a passport to enter Canada. The preferred identification document is the NEXUS Card. It will allow for remote clearing. To use it, ALL persons on board must have a NEXUS card. Otherwise, entry must be done in person at a designated port of entry.
You and all on board, should always carry proof of your citizenship, such as a passport, birth certificate, certificate of citizenship or naturalization, as well as photo identification.


MINOR CHILDREN
Parents who share custody of their children should carry copies of the legal custody documents. It is also recommended that they have a consent letter from the other custodial parent to take the child on a trip out of the country. The parents’ full name, address and telephone number should be included in the consent letter. Although not necessary, the letter could be notarized to confirm its validity. 

Adults who are not parents or guardians should have written permission from the parents or guardians to be entering Canada with them and to supervise the children. The consent letter should include addresses and telephone numbers where the parents or guardian can be reached.
CBSA officers watch for missing children and may ask detailed questions about the children who are traveling with you.

RETURNING TO THE UNITED STATES
The Master of any American pleasure boat must report to Customs immediately after arriving into the US from a foreign port or place and must also report any foreign merchandise on his boat that is subject to duty. The report may be made by any means of communication and should include the name of the boat, its nationality, name of the master, place of docking and arrival time. If an inspection is required, the Customs officer will direct the vessel to an inspection area.

Here is a link to the Canadian Border Services Agency that will give you additional information on entering Canada.

This link to CBSA will give you the location of all telephone reporting sites in Ontario.

TALL SHIPS CHALLENGE Great Lakes 2013 - Ports of Call

What Every CANADIAN Needs To Know About Crossing The Canada US Border


Posted by:  
My PhotoMichael Leahy, www.great-lakes-sailing.com


ENTERING THE UNITED STATES
As a Canadian citizen, when you cross the Canada US border, you must report to U.S. Customs and Border Patrol (CBP) for inspection. 


You arrive in the United States when your vessel first comes to rest in US waters, whether at anchor or at a dock. You would also be considered to have arrived in the United States if you had contact with another foreign vessel or a vessel entering US waters from foreign waters.

DOCUMENTS
When you cross the Canada US border, you must have documents that are Western Hemisphere Travel Initiative – compliant. These would include a valid passport, Enhanced Drivers License, NEXUS./ SENTRI / FAST / Card.
 
If you are a Canadian citizen entering the United States by pleasure boat, you will need the following documentation: 

For each person on board:
  • Name
  • Date of Birth
  • Passport, NEXUS, FAST card, Enhanced Drivers Licence or Secure Certificate of Indian Status
  • Boat Registration or licence number
  • Boat name
  • Boat length
  • CBP decal number for vessels 30+ feet
  • Dinghy licence and papers
  • Copies of prescriptions for any prescription medication
  • Value of any declarable merchandise
  • U.S. marina at which you arrived or will be arriving
MINOR CHILDREN Parents who share custody of their children should carry copies of the legal custody documents. It is also recommended that they have a consent letter from the other custodial parent to take the child on a trip across the Canada US border. The parents’ full name, address and telephone number should be included in the consent letter. Although not necessary, the letter could be notarized to confirm its validity. 

Adults who are not parents or guardians should have written permission from the parents or guardians to cross the Canada US border and to supervise the children. The consent letter should include addresses and telephone numbers where the parents or guardian can be reached.
CBP officers watch for missing children and may ask detailed questions about the children who are travelling with you.

REPORTING PROCEDURES
When you cross the Canada US border and arrive in the United States, Customs and Border Protection clearance may be obtained by one of three methods listed below: 

1) Be in possession of a pre-approved Form I-68 or NEXUS/SENTRI/FAST member card, and call one of the following numbers to report your arrival up to 4 hours in advance;
  • Minnesota/North Dakota: 1-800-505-8381
  • Northern Michigan and the Upper Peninsula: 1-906-632-2631
  • Port Huron area: 1-810-985-9541 ext. 235
  • Detroit area: 1-313-393-3793 or 1-313-393-3949
  • Ohio, Pennsylvania, Illinois, Indiana, Wisconsin, and Duluth, MN: 1-888-523-BOAT (2628)
  • New York State: 1-800-827-2851
Only the Master or designee may go ashore to report the arrival to CBP either in person or if participating in the I-68 or NEXUS/SENTRI/FAST programs, by telephone. No other person may leave or board the boat and no baggage or merchandise may be removed or loaded until the report of arrival is made and release granted by a CBP officer. Each crew¬member and passenger must also be in possession of an I-68 or NEXUS or SENTRI or FAST card to qualify for phone-in reporting

-OR-
 
2) Utilize a CBP Videophone inspection station located in the following;
  • In MICHIGAN: Mackinac Island
  • In OHIO: Put-in-Bay (Bass Island), Cedar Point Marina, Brands Marina (Port Clinton), East 55th Street (Cleveland), Lagoons Marina (Mentor), Chagrin Yacht Club (Eastlake), Grand River marina (Fairport), Ashtabula Public Dock.
  • In ERIE, PA: Presque Isle, Dobbins Landing, Perry’s Landing, Lampe Marina.
  • In NEW YORK: Dunkirk, Erie Basin Marina (Buffalo), North Tonawanda, Youngstown, Wilson, Olcott, Point Breeze, Rochester, Sodus Point, Oswego, Sackets Harbor, Clayton, Alexandria Bay, Morristown, Ogdensburg, and Waddington.
If using a Videophone station to report your arrival, all passengers and crew must report to the videophone for inspection with your identity and citizenship documents ready for presentation. Have a pencil and paper ready to record your inspection receipt number, which the Officer will give you upon completion of your inspection. This is an eighteen digit number and must be provided to Border Patrol Agents or other Law Enforcement officers when requested. 

-OR-
 
3) Report in person for inspection to the nearest open marine Port of Entry during the established hours. The following are designated ports of entry;
  • Milwaukee, WI (414) 486-7790
  • Chicago, IL (312) 296-6534
  • Duluth, MN (218) 720-5203
  • Baudette, MN (218) 634-2803
  • Crane Lake, MN (218) 993-2321
  • Sault Ste. Marie, MI (906) 632-7221 or (906) 632-2631
  • Port Huron, MI (810) 985-9541 ext.235
  • Detroit, MI (313) 393-3949
  • Toledo, OH (419) 259- 6424
  • Sandusky, OH (419) 625 – 0022
  • Cleveland, OH (216) 267 – 3600
  • Erie, PA (814) 833 – 1355
  • Buffalo, NY (716) 881-4447
  • Niagara Falls, NY (716) 282-3141
  • Lewiston, NY (716) 285-1676
  • Rochester, NY (585) 263-6293
  • Alexandria Bay, NY (315) 482-2065
  • Ogdensburg, NY (315) 393-1390
  • Massena, NY (315) 764-0677
  • Champlain, NY (518) 298-8346
After crossing the Canada US border, if you arrive at a marine Port of Entry after the normal business hours of a port, you must telephone the CBP to report. A CBP officer will provide further instructions regarding reporting and entry processing.

INFORMATION NEEDED
The following information must be available when reporting:
  • Name, Date of Birth & Citizenship of Master (with supporting documentation
  • Name of Boat
  • Boat Registration or Licence Number
  • U.S. Decal Number (if 30 feet or longer)
  • Name, Date of Birth, Citizenship of all passengers with supporting documentation
  • Home port
  • Current location


Here is a link to the US Department of Homeland Security that will give you additional information on crossing the Canada US border

Extended Visits

Canadians who enter the United States by boat are required to re-report into CBP every 72 hours until they leave United States waters.


RETURNING TO CANADA
If you have left Canadian waters and landed in the United States (i.e. docked or anchored in American waters), you are required to report to a CBSA-designated marine reporting site. Upon arrival at a CBSA-designated marine reporting site, call the Telephone Reporting Centre (TRC) at 1-888-226-7277 from the phone provided to obtain clearance. 

If you have left Canadian waters and entered U.S waters but not landed in the United States (i.e. not docked or not anchored), you must still report in. You can contact the CBSA by calling the TRC at 1-888-226-7277 from your cellular telephone upon arrival back into Canadian waters.

US Canadian Border Crossings - The Basics


Posted by: Michael Leahy, www.great-lakes-sailing.com

If you want to truly enjoy all of what the Great Lakes have to offer, US Canadian border crossings are inevitable. The following information applies generally, regardless of whether you are Canadian or American, leaving or returning to your home country.

Both countries maintain active surveillance on the Great Lakes. In fact, that was a central topic at a recent Maritime Security Conference held in Toronto, ON. I have read remarks in sailing forums that suggest otherwise but common sense says that every country is going to use all methods possible to protect their borders. And this certainly applies to the US Canadian border.

There is a Maritime Security Operations Centre, there is the joint Canada – US 'Shiprider' program whereby each country's patrol vessels have law enforcement officers from the other country on-board to eliminate jurisdiction problems, etc. In all cases, treat it seriously, have your proper paperwork on hand and be prepared to be asked to produce it when required. 

Landing

 You have 'landed' in Canada when you enter Canadian territorial waters. You are not considered to have landed if you are “in transit”, defined as proceeding directly from 1 point outside of Canada to another point outside of Canada in a continuous, uninterrupted passage with no delays or stop-overs. You have 'landed' in Canada if you are weaving in and out of Canadian waters, for example if engaged in recreational fishing.

You have 'landed' in the United States when your vessel first comes to rest in US waters, whether at anchor, at a dock or beached.

Identification

Never leave home without acceptable identification. I believe that this should always be the case regardless of whether or not you intend on crossing the US Canadian border. You just never know what situations may develop.

The Master of the vessel (usually the owner/operator) is fully responsible for ensuring that there is complete documentation for every person on-board. The preferred piece of identification is a valid passport There are other acceptable forms of identification as well. For Canadians, some of these would include an enhanced driver's license, a NEXUS Card, a Permanent Resident Card or a Secure Certificate of Indian Status. For Americans, in addition to a valid passport or secure or enhanced driver's license, other acceptable identification would include a U.S. Passport Card, a NEXUS Card or a FAST Card.

If you have minor children on-board, you should be aware that with any US Canadian border crossing, customs and border officers are particularly vigilant because of the problems of missing children, runaways, parental kidnappings and human trafficking. Ensure you have proper documentation.

Documentation

It important to carry the ownership and insurance documentation of your vessel. If you have prescription medications in your medical kit, make sure you have copies of the prescriptions to match them.

These documents can be carried in a waterproof case, available for inspection upon request. As Master, you are responsible for this. As a parent, you will likely have to organize it all for your family yourself anyways. However, if you have guests on-board and plan to enter another country, it is only prudent to ask to see each person's documentation – I would hate to sail across one of the Great Lakes only to be turned back because someone didn't have their documents. Or worse, be accused of attempting something illegal and having my boat seized. It does happen and I suspect the expensive taxi ride home would be an unhappy trip as you contemplate what you have lost.

Items on board

Know what you have on-board. Normal consumables are no problem. However, customs and border authorities are concerned with smuggling which is alive and well on the Great Lakes. With reference to Canada, there are specific prohibitions on bringing certain firearms into the country. Nothing will slow down your entry into Canada as much as discovering that your guest has slipped a hand cannon into the bottom of his or her duffel bag.

Each country has reporting requirements for large amounts of currency (CAN$10,000 and US$10,000). Failure to declare such amount can result in penalties including seizure of the money and possibly seizure of the boat. The best advice is to bring what you need and no more. Use a bank card as ATM machines are common. The Port Reviews list, where possible, the closest ATM to the harbour.

Both countries have stringent laws regarding illegal drugs. Again, as Master, it is your responsibility to ensure that everyone on-board is in compliance with the law. Take no chances here. Personally, I have no problems speaking to a guest directly about this and, if I have any concerns at all, asking to see their kit. After all, its my boat on the line – and yours too! That said, seizure of your boat will be among the least of your problems if illegal drugs are found on-board.

The purpose of these general remarks is just to have you think about some of the other issues involved when you begin to plan a cross-border adventure. US Canadian border crossings are not difficult or stressful - if you come prepared.

Tuesday 25 June 2013

Barometric Pressure Readings

Posted by: Michael Leahy, www.great-lakes-sailing.com

An essential element of understanding weather is an understanding of atmospheric pressure and the changes that occur. Atmospheric pressure is the weight of the air pressing down on us. A column of air measuring one square meter (approximately 11 square feet) weighs 10 tons at sea level. However, that pressure can vary for any number of reasons,


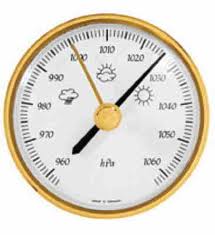
Atmospheric pressure is also known as barometric pressure and is measured by a barometer. A competent sailor keeps a weather eye on the barometer and is aware of changes in pressure. Changes in pressure are measure in either inches (Imperial measure used in the United States) or millibars (metric used in Canada). 

Air pressure is continually rising and falling as weather systems move through. We already know that when air is warmed, it rises. This creates a zone of low pressure. Cold air on the other hand is denser and sinks to the earth's surface, increasing the air pressure. These changes are measurable and have well-recognized qualities. 

Points of similar pressure are connected, creating isobars – those familiar lines we see on weather maps. Nature abhors a vacuum and any time there is an imbalance of forces, nature attempts to re-balance them With air pressure, this occurs by air moving from a High pressure zone to a Low pressure zone. 

Air would normally flow directly from a High to a Low. But ... remember the Coriolis Effect? It causes the direction of air flow (wind) to 'bend' – in the Northern Hemisphere, to the right – as it spirals out and away from the centre of the High.

Buys Ballot's Law
This gives rise to what is known as “Buys Ballot's Law”. Named after Christoph Buys Ballot, a Dutch meteorologist in the 19th century, Buys Ballot's Law says that if you stand with your back to a wind and extend your left arm directly out from your side, you will be pointing at the centre of the Low pressure zone. Knowing where the Low is centred and what your position is relative to its centre can be very useful in your planning. In the Northern Hemisphere, winds blow counter-clockwise around a Low. Winds will blow generally parallel to isobars, so seeing where you are located relative to the movement of the Low will give you some insight into how the winds are going to change as it passes. The closer the isobars, the stronger the wind. 


Here are some useful things, courtesy of NOAA, to keep in mind about barometric pressure. 

The FALL of the barometer (decreasing pressure)
  • In very hot weather, the fall of the barometer denotes thunder. Otherwise, the sudden falling of the barometer denotes high wind.
  • In frosty weather, the fall of the barometer denotes thaw.
  • If wet weather happens soon after the fall of the barometer, expect but little of it.>li>
  • In wet weather if the barometer falls expect much wet.
  • In fair weather, if the barometer falls much and remains low, expect much wet in a few days, and probably wind.
  • The barometer sinks lowest of all for wind and rain together; next to that wind, (except it be an east or north-east wind).
The RISE of the barometer (increasing pressure)

  • In winter, the rise of the barometer is a tell-tale sign of frost.
  • In frosty weather, the rise of the barometer presages snow.
  • If fair weather happens soon after the rise of the barometer, expect but little of it.
  • In wet weather, if the mercury rises high and remains so, expect continued fine weather in a day or two.
  • In wet weather, if the mercury rises suddenly very high, fine weather will not last long.

The barometer rises highest of all for north and east winds; for all other winds it sinks.

The barometer UNSETTLED (unsteady pressure)

  • If the motion of the mercury be unsettled, expect unsettled weather.
  • If it stands at "MUCH RAIN" and rises to "CHANGEABLE" expect fair weather of short continuance.
  • If it stands at "FAIR" and falls to "CHANGEABLE", expect foul weather.
  • Its motion upwards, indicates the approach of fine weather
  • its motion downwards, indicates the approach of foul weather.

Monday 24 June 2013

Types of clouds and what they tell us

Clouds are the visible signposts of weather. As air is warmed, it expands and thus can hold a great deal of moisture. As it rises, it cools and the moisture it can hold is reduced. The moisture condenses causing what we see as clouds. By looking at the characteristics of clouds, we can understand what is happening and what may be happening in the near future.

Although cloud shapes can seem infinite, in fact, they have been grouped according to shape (2 types) and the altitudes at which they form (3 levels). The 2 basic shapes are cumululoform – the big puffy cotton ball-like shape and stratoform – the flatter, more stretched out pattern.


Cumulus clouds are created by the vertical movement of warm air trying to rise over the colder air above it. This vertical movement is therefore unstable air.


When there is warmer air above colder air, there is little vertical movement and therefore the air is stable. Clouds here don't pile up in big ball shapes but rather stretch out in broad, featureless, flat clouds called stratoform clouds.

High clouds form above 21,000 feet / 7,000 meters and have the prefix 'cirro'. They are made up of ice crystals. They are cirrus, cirrocumulus and cirrostratos.

Middle clouds form between 6,000 - 21,000 feet / 2,000-14,000 and have the prefix 'alto'. They are altocumulus and altostatus.

The lower clouds form below 6,000 feet / 2,00 meters. They are are cumulus, stratus, stratocumulus and nimbostratus.

One remaining form of cloud needs to be addressed and that is fog. Fog is simply a low-lying cloud whose base is on or very very close to the surface of the earth. There are 2 types.
Radiation fog is what we see on cool, clear nights in late spring and early fall. It is caused by the air close to the earth's surface being cooled to the point that moisture in the air is released (in other words, the temperature has fallen to the dew point). This fog can be dense or thin or patchy. It usually burns off as the sun rises in the morning.

Advection fog is created by warm air blowing over cold water. The moisture in the wind is released as the air is cooled. This can result in quite dense fog, sometimes referred to as sea fog. which does not burn off as the sun rises – after all, the air is already warmer than the water beneath it. A change of wind direction, ideally with much cooler air will disperse advection fog.

BY : Michael Leahy

Saturday 22 June 2013

Super Moon Sunday June 23, 2013


This Sunday is a full moon - and a very special full moon. It is known as a super moon. This is when the closest approach of the moon in a lunar month coincides with a full moon. The moon appears to be larger and brighter at this time. Its really quite beautiful. There is a lot of good information at this site: www.timeanddate.com.

Chart Reading 101


Many recreational boaters in small boats don't consider it important to have charts onboard. Bad idea, even if you are just operating on your local lake. Perhaps you are not yet a navigator, but a chart onboard allows you to compare what you are seeing with what you should be seeing and can help you keep your bearings.

I did an instructor's clinic a year or so ago on Lake Lanier in Georgia. This is a huge lake north of Atlanta. The school that hosted the clinic had to borrow a few boats from another location on the lake and several of the instructor candidates volunteered to move the boats. I happened to be on the lead boat with the school's owner who was familiar with the lake, however, the trailing boats all had skippers who had never been on Lake Lanier before and none of the boats had charts. Needless to say, as the other boats leisurely sailed around and got lost, we had more and more radio calls asking for directions.

Nautical charts are different from maps in that they specifically depict water areas, while maps concentrate on land area, roads, landmarks, etc. Land areas and features on charts are sketchy and are noted only for their interest to the boater. Unlike maps, the nautical chart conveys much information specifically designed to assist in safely navigating the area that the chart covers.

Several of our visitors (that includes you Judy, in your brand new spiffy boat) have asked for a tip on reading nautical charts so we thought we would take a "non-navigators" trip from the Shark River out to the Atlantic, down the Jersey Shore, in the Manasquan Inlet and down the Intracoastal to Ortley Beach.

Important tips:
  • Study your chart thoroughly.
  • Look at the position from which you will start and visually follow along the course you wish to take.
  • Look for "notes" - water depths, obstructions (especially under water), bridges, power lines or any other unusual items that may be a hazard to your progress.
  • Make a note of each of these on a separate piece of paper.
  • Make note of all buoys and markers you may pass in the order they will appear. This will give you a documented picture of your route and what you should expect to see without having to continually try to find a small marker on the chart.
  • Look for visual objects featured on your chart that you should be able to observe and identify to confirm your position.
  • Always check the weather before departing - in this case, also to make sure you will be safe in navigating the Shark River Inlet.


Disclaimer: This trip is for demonstration purposes only and is taken from charts which may not be up to date. Boaters should not rely on the information presented here for navigation in this area and should consult current local charts for specific details and directions.
chart1.gif (21733 bytes) Using the Shark River detailed inset, let's assume that we are departing the Municipal Boat Basin on the south side of Shark River Island. We can see from the chart note that we have a controlling width of 50 feet and 7.5' depth from the Boat Basin to the jetty channel. The channel then widens to 100 feet with a depth of 18 feet. Click to see enlarged chart. *Note: This information may not be currently valid.
As we proceed toward the Atlantic, our first concern will be the power lines
and two bridges that we will encounter.


The power lines have a clearance of 31 feet so we are okay in our small cuddy cabin cruiser. The first bridge has a horizontal clearance of 50 feet and a vertical clearance of 8 feet. The second bridge has a horizontal clearance of 50 feet and a vertical clearance of 13 feet. Since the highest point on our boat is the VHF antenna and that is only 6 feet above the water we're okay for the bridges. chart2.gif (22931 bytes)

  Once we have cleared these first two bridges we will be passing the Belmar Basin on the right and the Shark River CG on the left. We then will traverse another bridge with a horizontal clearance of 90 feet and a vertical clearance of 15 feet. Once again, we are okay as we pass under the bridge.
chart4.gif (13690 bytes)
We are now approaching a FL R 4sec 33ft 4M "2" HORN marker and a FL G 4sec 10ft 4M "1". What do these series of letters and numbers mean? Simply put, we will be passing, on our port side, a flashing (FL) red (R) lighted buoy that flashes (at night) every four seconds (4sec), which is 33 feet tall (33ft), can be seen for 4 miles (4M), is marked with the number 2 ("2"), and is equipped with a horn (which blasts once every 15 seconds during reduced visibility, according to the Light List, Vol. 1, Atlantic Coast). We also will be passing, on our starboard side, a flashing green lighted buoy that flashes every four seconds (at night), is 10 feet tall, can be seen for 4 miles and carries the number 1. There is an imaginary line between these two markers that represents the COLREGS demarcation line. Remember what this is? This is where the Inland rules end and International rules begin when leaving and vice-versa when returning.

chart6.gif (21537 bytes)

Once we have cleared the markers and the Shark River Inlet we have in site the RW "SI" Mo(A) WHIS. This is the red and white vertically striped safe water mark. We won't go out this far. We will note our depths on the chart and our depth finder and turn south when we have reached the 30 foot contour line. This is the solid line running parallel to the beach. This should be far enough out to keep us out of any breaking waves and far enough to keep away from some of the wrecks that we see noted closer to shore to the south. Make a note of the time. Let's assume that we are just going to go on a leisurely cruise down to the Manasquan River Inlet at 10 nautical miles per hour. A little quick math and you figure this to be 1 nautical mile every 6 minutes. 

As we proceed south following the 30 foot contour line and watching our depth finder can enjoy the view of the beach. We make note of the distance legend on the chart and find that one nautical mile equals approximately one and one-half inches on the chart. After traveling south for approximately six minutes you should be able to see the radio tower just off your starboard beam. Another eight minutes or so and you should be able to see the hotel dome to starboard. Another seven minutes and you should see to starboard a yellow (Y) privately maintained spar marker labeled with the letter "A". Six more minutes and you will be approaching another yellow privately maintained spar this time labeled with the letter "D".

chart7.gif (17800 bytes) From this point, you now have the Manasquan Inlet entrance markers in site. (Click to see enlarged chart) You will turn west to enter the Inlet between the FL R 4sec 30ft 5M "4" and the FL 6sec 35ft 15M HORN. Be sure to steer clear of the jetty, as marked "Rks" on the chart. "Remember Red Right Returning" Coming in the Inlet you are again passing a COLREGS demarcation line and once you have cleared the markers you are again obeying Inland rules.
vspacer.gif (821 bytes)

Once inside the inlet we will just follow the channel with a depth of 8.5 feet until we reach R"2" Fl R 4sec marker. This is where the channel begins to narrow until we are filtered into the very narrow channel at marker C"3" just before the first bridge we see returning from sea. This has only a 3 feet vertical clearance but since it is a railroad bridge, it is usually open to navigation except when there is a train coming. Continuing to follow the channel, the next obstructions are another bridge with a 30 foot vertical clearance and power lines crossing the channel with a clearance of 107 feet. No problem here. chart8.gif (25982 bytes)

Even though the channel now starts to enter a physically wider area of the Manasquan River, you note that the channel is marked more frequently. This is because the water is very shallow (1- 1.5 feet in some areas) outside the channel. We pass the G"1" marker to port and FL R"2" to starboard. We continue inland keeping the red, even-numbered markers to starboard and the green, odd-numbered markers to port.
chart9.gif (27730 bytes)

Just after we have passed R N"6A" and C "7A" we turn south into the Point Pleasant Canal, which begins the ICW, keeping FL R"8" to starboard. This marker should have a yellow triangle indicating that it is also a marker in the ICW. Once inside the ICW going generally south, we will keep the red markers to starboard and green markers to port. We notice that as we approach the first bridge with 10 foot of vertical clearance, there is a special note on the chart (Note: D) which advises that we should use extreme caution because of turbulent waters around bridges over the Point Pleasant Canal.
 

chart10.gif (70545 bytes) From here we are cautious and continually check our chart for markers and objects from which we can visually note our position - keeping red markers to starboard and green to port. You will notice on the chart that there are areas of very shallow water depth (the bluer areas). In approximately 10 - 12 miles we see the Spire and Tank to port as we approach the causeway which runs from the mainland to the beach. This should be recognized as the area between Ortley Beach and Seaside Heights. In order to get into the beach area it will be necessary to follow the privately maintained channel which runs north of, and parallel to, the causeway. (The chart indicates "see note B". Note B reads: Channel is marked by privately maintained seasonal aids.) From here, we would want either local knowledge or a more detailed chart than we have been able to consult on this adventure.
  Many chart symbols are shown on the back of the chart. Chart #1 is a collection of all the symbols found on nautical charts. Some common chart symbols are depicted here.
Although this was a boater-friendly trip covering only about 20 miles, hopefully you get the idea how important your nautical chart can be in making your trips safer. Would you have thought about overhead powerlines, bridges and their heights, looking for specific markers to use as "road signs" which indicate where to turn, using depth contour lines as a roadway in the Atlantic, sighting objects on land to keep track of where you are? If not, perhaps you should. Just make sure you have charts onboard.

Thursday 20 June 2013

Minimum Required Equipment for Boats in Canada

From the Canadian Coast Guard Small Vessel Regulations

Less than 5.5 metres in length (18.0')


  • 1 approved PFD (or throwable life-saving device) for each person
  • Sound signalling device
  • 1 hand-bailer or manual pump
  • 1 Class B-I fire extinguisher if vessel has inboard motor or fixed fuel tank OR heating or cooking appliance that burns liquid or gas fuel.
  • Lights must comply with Collision Regulations if permanently fitted
  • 2 oars with rowlocks or 2 paddles

5.5 - 8 metres in length (18.0'-26.2')


  • 1 approved PFD for each person on board
  • Sound signalling device
  • 1 hand-bailer or manual pump
  • 1 Class B-I fire extinguisher if vessel is powered or has heating or cooking appliance that burns liquid or gas fuel.
  • Lights must comply with Collision Regulations if permanently fitted
  • 1 approved lifesaving cushion or buoyant heaving line or life buoy 508, 610 or 762 mm diameter
  • 6 approved distress flares: three A, B, or C type flares AND three A, B, C or D type flares [Except if vessel is engaged in racing and has no beds/bunks or operating in a river, canal or lake in which the boat can never be more than 1 nautical mile from shore, or boat is propelled by oars or paddles].
  • 2 oars with rowlocks or 2 paddles or 1 anchor with 15 m (50') rode

8 - 12 metres in length (26.2'-39.4')


  • 1 approved PFD for each person on board
  • 1 anchor with 15 m (50') rode
  • 1 hand-bailer AND 1 manual bilge pump
  • 1 Class B-II fire extinguisher if vessel is powered or has heating or cooking appliance that burns liquid or gas fuel.
  • Lights must comply with Collision Regulations if permanently fitted
  • Sound signalling device must comply with Collision Regulations.
  • 1 life buoy 610 or 762 mm diameter
  • 15 metres (50') of buoyant line
  • 12 approved distress flares: six A, B, or C type flares and six A, B, C or D type flares. These are valid only for 3 1/2 years from date of manufacture. There no exceptions for racing.

12 - 20 metres in length (39.4'-65.6')


  • 1 approved PFD for each person on board
  • 1 anchor with 15 m (50') rode
  • Efficient bilge pumping system
  • 2 Class B-II fire extinguishers, one by entrance to sleeping cabin and one next to the engine space entrance. 1 Class B-II fire extinguisher if vessel is powered or has heating or cooking appliance that burns liquid or gas fuel.
  • 2 buckets to extinguish fire
  • 1 fire axe
  • Lights must comply with Collision Regulations if permanently fitted
  • Sound signalling device must comply with Collision Regulations
  • 1 life buoy 762 mm diameter or 2 life buoys 610 mm diameter.
  • 15 metres (50') of buoyant line
  • 12 approved destress flares: six A, B, or C type flares AND six A, B, C or D type flares

All these regulations are for minimum equipment required on a vessel.


 For more information:
Office of Boating Safety 
 Canadian Coast Guard 
 (613) 998-1433 
or 1-800-267-6687 

Be Prepared - Charter Check List

Extra Items to Take On Your Charter Charter companies do provide the basics. But often, small items like navigation instruments, toolboxes and flashlights may not be checked due to the quick turn-around of the chartered boat. The items may not be missing, they may just be damaged, rusted, or neglected to the point that they not longer are useful.

Navigation Tools
You may find that the dividers provided in the chart table have slid around until their ends resemble fish hooks. It is a good idea to bring your own navigation tools including dividers, parallel rules, pencils and sharpener, eraser and a pocket calculator. You should probably also throw in a hand bearing compass and your own binoculars.

I always carry my portable GPS and a set of spare batteries. Even though the boat may have its own GPS the portable makes a good backup. In addition, if the onboard GPS does not have the associated operations manual it may be difficult to program in waypoints in an expedient manner. At least I know how my own works. 

Charts and cruising guides are expensive items, but bring your own. You should also have onboard a light list and Coast Pilot or Sailing Directions for the area in which you will be chartering.

Safety
The charter companies will provide life jackets, but they normally are too bulky for routine wearing. I like to bring my own personal inflatable jacket with a built-in safety harness simply because it is already adjusted to my size and is comfortable. 

You don't necessarily have to carry extra line to the charter destination but prior to leaving the charter company dock make sure you have plenty of docking lines and lines that can be rigged as jack lines.

I would also advise bringing along a knife and marlinespike, a small sharpening stone and a Gerber or other multipurpose tool. 

A hand held VHF makes a good backup to the boat's radio and also can be used in the cockpit rather than having to go below.

Tools
Add a small set of screwdrivers, a compact array of wrenches, and a pair of wire cutters and pliers, and you should be able to handle most temporary repairs. Don't forget a flashlight, a 20-foot hank of fine line and some whipping thread. WD-40, electrical tape and duct tape also come in handy. Some cotter pins of assorted sizes in a film canister and rip-stop tape should prepare you for most minor emergencies. 

You might want to check in advance to see if the charter company provides soft wooden plugs (bungs) that can be used to make a quick plug, should you have a hose or through-hull fail. If not, bring your own.

Personal Items
Don't forget to pack your foul weather gear. A night watch in the rain can be quite uncomfortable if you're not prepared.

Do pack a can opener and a cork screw. Opening that favorite bottle you saved for the last night with a rusty screwdriver is not very appealing. 

I use the list below whenever chartering or teaching students. Feel free to copy and paste into your favorite word processor and modify or personalize as necessary. You can check off each item before you leave and check off again prior to getting off the boat to make sure you have collected all your belongings.

DEPARTURE AND RETURN - PERSONAL EQUIPMENT
Depart
Return
  Binoculars  
  Foul Weather gear - coat, pants, boots  
  Hand held VHF  
  Cruising Guide  
  Chart(s)  
  Coast Pilot/Sailing Directions  
  Light List  
  Flashlight with batteries  
  Safety harness/PFD  
  Pencils - pack of a dozen sharpened  
  Navigation tools, dividers, parallel rules, calculator  
  Deviation/Variation wheel  
  Red Flashlight  
  Gerber Tool Kit  
  GPS with extra batteries  
  Tools  
     
 
PERSONAL GEAR
 
  T-shirts one per day  
  Turtlenecks - seasonal  
  Shorts - 4 pair  
  Sweaters - seasonal  
  Wool watch cap - seasonal  
  Underwear - one change per day  
  Personal hygiene items  
  Socks - one change per day  
  Long pants 2 pair seasonal  
  Boat shoes - extra pair  
  Gloves - sailing, rubber, cotton, leather  
  Planner/Calendar  
  ID, calculator, check books, credit cards  
  Bathing suit  
  Snorkel and Fins  
  Personal and expense money  
  Medications  
  Camera with film